Wednesday, April 20, 2011

Laundry Room Nitty Gritty


The Laundry Room is finished,
and the Studio 5 segment turned out great --
Now... I thought I would share with you a few of the fun little details.


BEFORE
We have had this washer and dryer for about 3-4 years.
My husband purchased them as a surprise for me
while I was out of town!
So nice.
They really have been so great after 14 years with a used pair
that we got right after we were married.
I think they look very fashionable
with the newly designed laundry room!


AFTER
It is fun to incorporate the colored appliances into the overall design.


I really never used this space ---
it was honestly filled with more boxes that needed to be emptied.
What a great excuse to get them put away!


This is in the middle of the job.


End Result.
I knew that I wanted to paint the walls green ---
next I had to find fabric that would work.
I found some wonderful green but definitely needed to add
a couple of other colors to make the space feel right.

I ended up with a great striped fabric
--- it had the colors of the washer and dryer
and some brown, as well as the green.


I found this big mug and it was just the right color.
You want to place the colors around the room
so that it ties the space together.


I added a little more fabric on the chair
with a pillow and a sash.

It softens the chair and pulls the color around the room.


I must say, I do love the sash!


The bulletin board is just made of heavy card board
covered in batting and fabric then placed in a frame that I already had.
It helps to take that blue color onto the wall.


The brown ribbon and the green apples
lined along the top
are more pops of color around the space.


We just took old buttons from granny's button box
to finish off the board!


See more touches of brown and blue.
The fabric on the baskets is just glued along the top ---
no sewing involved!


I like to collect frames.
The three above the sink are shadow boxes
that I found at Burlington years ago.
The were filled with little oriental ladies on sale for $1.88.
I bought 30 of them!!

They have come in handy over the years.
I just glued in scrapbook paper that had the same colors.
It made for some great artwork!


I wanted to add fabric to this space
and since the cabinets did not have doors
this was the perfect place to put some little curtains.

I got a tension rod, very inexpensive---
then hemmed up the fabric,
added the three kinds together,
and it works!


This is an old mirror that I have had in my basement for years.
It came from my great grandpa's house.
The frame was pretty boring
so I added a few little decorative swirls---
I used puff paint (glitter glue with paint in it),
because I had it,
but I am thinking that Elmer's glue may work just as well.
Then I spray painted with a can of white paint.

It is always nice to add a few older items
when you are decorating a space because
you can make it more interesting and more personal.


Well, here it is BEFORE--- quite uninspiring yet with great potential!


And the AFTER has been such a joyful, happy place to be in!

Hopefully you can take a few of the tips
and do something with your washing space!

Cozy Outdoor Spaces


This time of year I love to be outside on the porch
or under an umbrella.

What can you do to make these spaces feel more cozy?

The same design principles that we use inside the house
work for an outdoor space.
In the picture above see how they added fabric
with a tablecloth and toss pillows.

Notice the potted flowers on the table and around the daybed.


More FABRIC--- the pillows and the tablecloth.
See how the lemons and the vase of flowers
make such a difference.
Imagine the space without these items --- it is not nearly as inviting.


I do love rocking chairs on a porch---
it just says RELAX to me.
There are toss pillows and potted plants
as well as a few tables to set a glass of lemonade.


So if you want to cozy up your outdoor space ---
even if it is just a little patio ---
add some fabric and FLOWERS!

Arranging Photos on the Wall

Okay, Life is wonderful! . . . and I have not forgotten you all. Here is a little post for today ---

One example of how to group some framed photos.


The spacing between the frames is about the same width, with the FAMILY centered at the top.

Try a grouping at your house!

Using Travel Souvenirs in Decorating

  Another fun souvenir you can get for decorating are maps. Both my husband and I love them. We picked this one up in Bermuda:


One of the best things I've ever found at a garage sale was a mat cutter. Now I can frame these maps and these unusal-sized prints easily and cheaply. I love maps, but you can run out of wall space quick. That's why I like to keep looking for other objects to use.  Of course, your trip photos can make some of the best decor around your home. Blow a few up nice and big or photoshop or picnik them to Black and White or Sepia tones.

(An antiqued photo I took in Italy and 3 photos I took in B&W in France.)

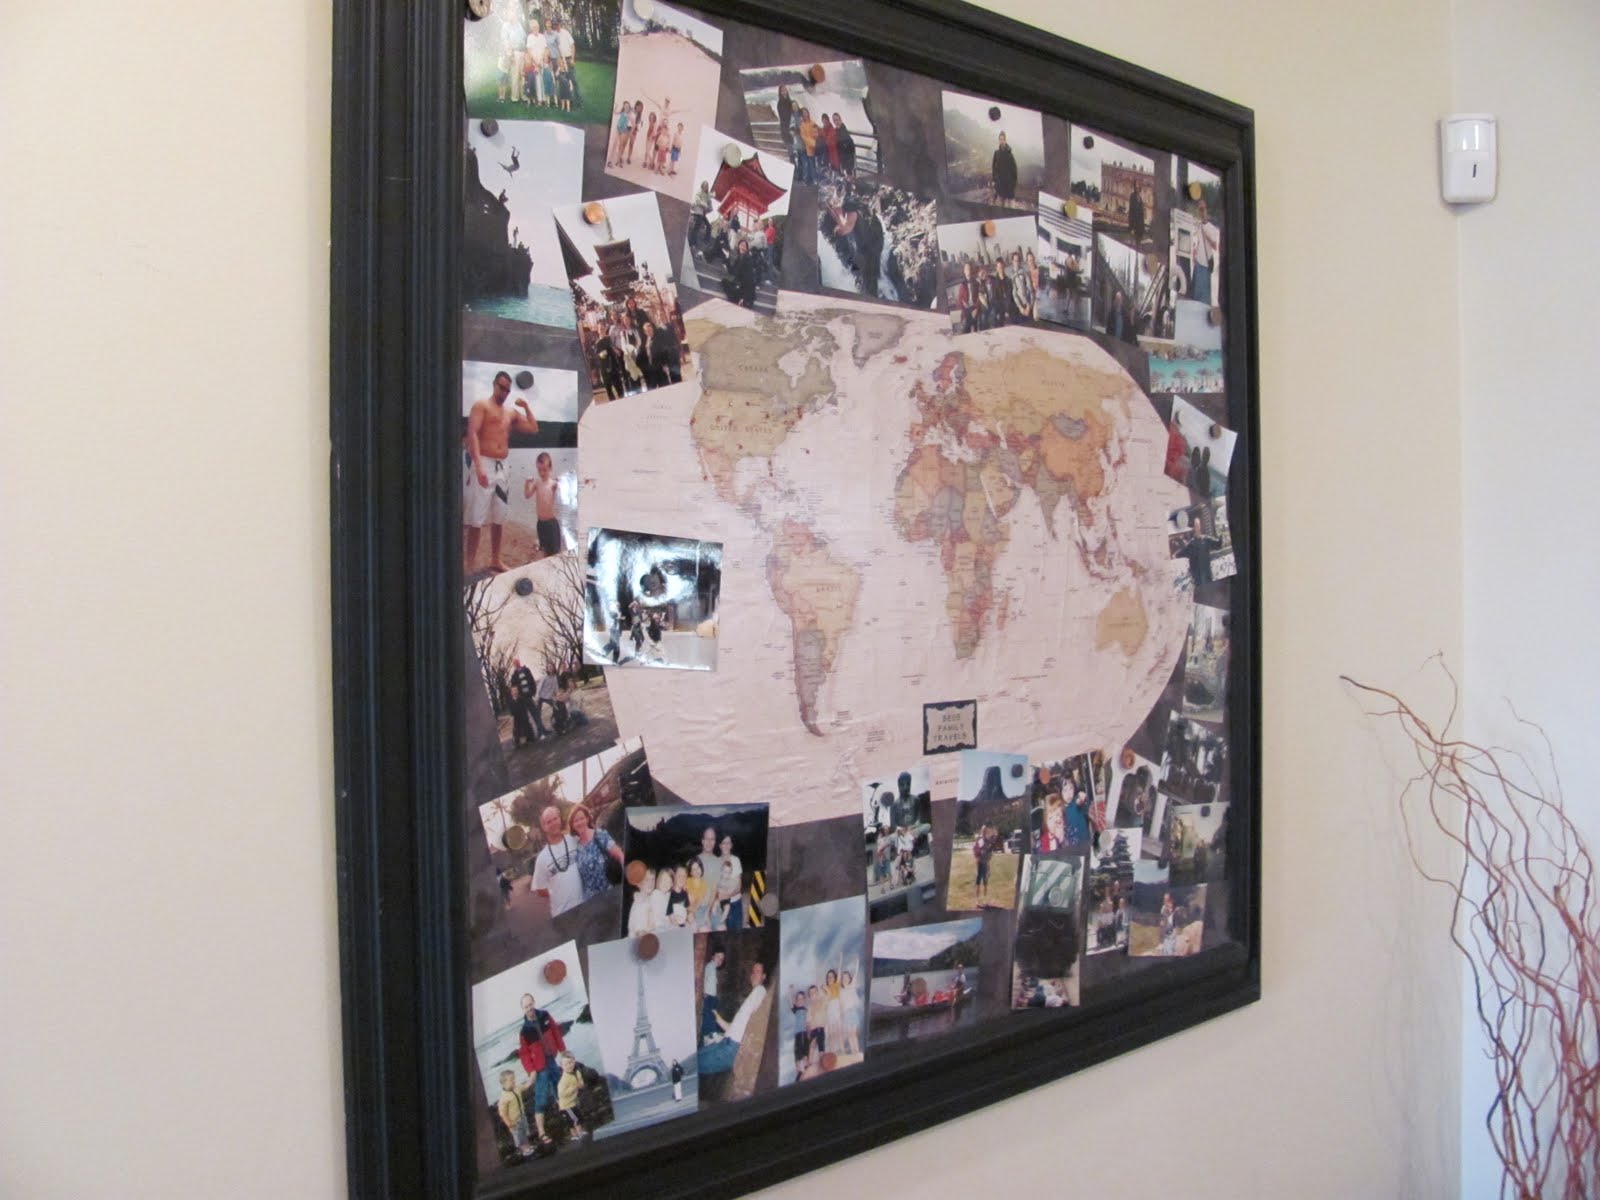
You can also make one of these huge map boards to keep track of where you travel, as well as display a few photos:

(see details of how to make this in my earlier post here.)

 I love the proof sheet look to these framed collage of summer shots. Heck, if you can find a turtle shell, bring it home!

I love the bright colors used in this summer vacation display. Many of the photoshop and picnik(free) let you turn those colors up to really pop.

(southern living)
I love how these are grouped and themed so that each framed collage is a seperate trip, yet the whole wall is of all the family's travels. I like how they labeled each collection.


(tracey vue)
Make a vintage-looking poster of your trip. Use that 70's effect on one of your photo editing programs.


(via poppytalk)
How easy would this display idea be to change out? Put new photos, vintage postcards and your trip maps up after each trip and rotate the display regularly.

Of course, you could go overboard with your trip photos and do this:
(sunset)
Watch out for a strong breeze!!

How about taking your trip photos and using your editing software to turn them into coloring pages for your kids?

(mamadramalogues)

Wouldn't that be fun for a present to help the kids remember during the year the fun memories they made during summer break?

Picture Perfect

Here are some great ideas for creating your perfect picture wall.

When creating a composition of bright, colourful photos, try framing them using a combination of black & white matting.

Frame your favorite artwork but switch up the colour and style of the frames to suit each piece.

Create a dramatic look by covering an entire wall with framed photos, cards, illustrations and album art.

A grouping of black & white photos with mis-matched black frames can easily be added to when arranged in a random manner radiating out from a central point on the wall.

This clean and simple grouping is achieved by paring down the collection and combining frameless pieces with slim, contemporary frames.

I love this idea of aligning the majority of the photos along the bottom and introducing only a few random photos above.

If you don't want to commit to nailing your photos directly to the wall, a picture rail can be a great solution. This gives you the freedom to change things up or add and subtract from your collection over time.

In my opinion, this is the most interesting photo wall because it introduces random objects into the mix like the liquor sign and the antlers.
Image Credits (from top): Living Etc., Jonathan Adler, Interior Design Magazine, Ideal Home, Canadian House & Home, Elle Interior, Decor Pad, Apartment Therapy   http://www.modnest.ca/journal/2010/1/7/picture-perfect.html

Kid's Playrooms...


  • Kid's playrooms are fun spaces to design...

  • To me, in any playroom I design or even in my own kid's playroom spaces - it's all about good storage that works for both the little ones and you (the clean up crew)...

  • I thought as spring cleanings begin...these images might inspire some new looks to your own playrooms out there...

  • Fun side note, changing up the toys from time to time in the playroom...keeps toys "interesting" for the kids...Store some away and rotate them out...The discovery of the toys again is always a great way to keep the energy moving...and the kids interested in the toys a little at a time...

Pantry Design...


  • With the holidays over and with winter focusing your thoughts on the inside of your home...it's all about getting organized...A pantry might help with getting your kitchen life in order...

  • Kitchen pantry spaces vary from house to house...I like it when I see new homes designed with small rooms intended to be for "the pantry"....food storage, extra cookware and dishware...A well organized room that is an extension of your kitchen...


  • If you are thinking of renovating your kitchen - it might be a great idea to think about how you might create a pantry room in your own home...The space doesn't have to be too big but it's all about being organized...

  • Plus, if you have small kitchen to begin with - putting in a pantry room can also buy you some extra space...When renovating - this way of thinking can also save you money on having to buy a ton of new cabinets....If you have a room set aside for storage and food stuff - you might be surprised at how it frees up your kitchen space...as well as your renovation budget...


  • As you can see from these various spaces...you can have anything from simple open shelving to nice look cabinet pieces in the space...It can be a room that has a great, stylish look to it or it can be simple a room that is neat and efficient but not necessarily stylish. I say, why not paint the room a great color and add some new lighting...Hey, maybe it's the one space you can paint a wall color that you love - a color you wouldn't want to put into another big room...

  • One of my favorite pantry rooms that I have seen was done with all re-purposed cabinets found at a local architectural salvage store...Add a new coat of paint to them and they can look great...


  • Figuring out your own space....Perhaps you have a closet space, a mud room that can be used in a more creative way or maybe you are starting from scratch with a new build....Definitely plan on having some sort of space that is all about having a place for everything kitchen related - a space that is a well-thought out pantry room...


  • What I like about this type of space is that it keeps you organized once everything has a place...If paper towels or jars of pasta sauce run out - you can see that you need to add that to your shopping list because of the empty space on the shelves...

  • Plus, with many families shopping at stores where they buy things in bulk - a pantry room can give them the added bulk storage they may need...


  • In England, I remembering seeing many older homes that had a room set aside off the kitchen that was all about being simply lined with shelves for all the daily cookware, dishware and everyday foods such as potatoes, apples, onions, etc. to be within easy reach. This allowed for the main kitchen space to be done simply without too many cabinets or need for a ton of extra storage...